

Nails
Steps for a Quick and Easy Buff Manicure
09
Mar
Mar
While colored gel manicures are all the rage, as are patterns and designs, sometimes the clean and professional look of a buff manicure is ideal. If you are headed to an interview, you might not want to show up with red and blue plaid fingernails, but that depends on where you are interviewing.
The buff manicure is actually much simpler than any polish application. Personally, I also like this one when I travel because it is so much easier to maintain!
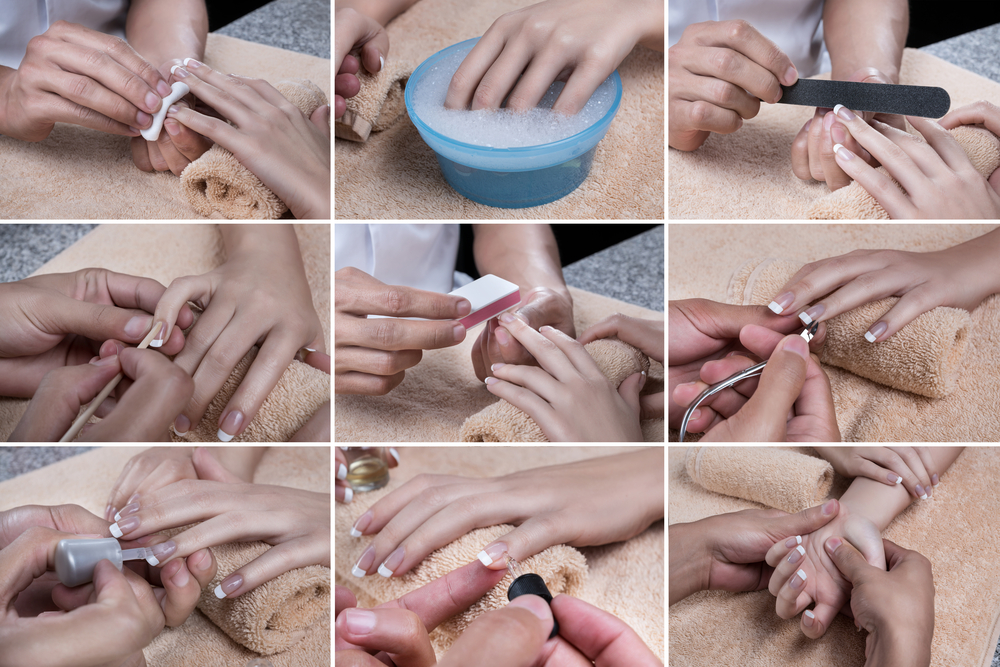
Here is a quick five step tutorial on the buff manicure:
- Clean your nails. Before you do anything else, you will need to remove existing polish or oils from your nails’ surface.
- Shape and trim your nails. If your nails need trimming or shaping, many professionals recommend a crystal file to minimize tearing of the nail. I hardly ever use clippers on my fingernails.
- Buffing time. It is important to remember never file or buff your nails if they are wet. This can lead to weakening of the nails. The nail buffer should have a fine grit, so lightly gritty that you can hardly feel it on the file. Gently buff your nails in small circular motions; never too hard or too fast.
- Care for those cuticles. The key to a beautiful buff manicure is often the cuticle care step. Massage in a moisturizing cuticle cream and gently push back the cuticle area with an orange stick.
- The final shine. The final step is the true showstopper for a buff manicure. With the smoothest side of your nail buffer (it should feel almost like silk), lightly rub the surface of your nails to bring out a high gloss.
All shined up and ready to go!
beautiful work and educational